

“If you’re craving a sweet treat that’s both easy and impressive, look no further than Classic Cannoli Squares!”
Every bite of these treats will transport you straight to Italy. The crispy layers of phyllo dough contrast beautifully with the creamy, sweet ricotta filling. I created this recipe to share with my family during our Sunday dinners, and they instantly fell in love with its simplicity and flavor. Pairing chocolate chips with a hint of cinnamon brings a delightful twist to this traditional dessert.
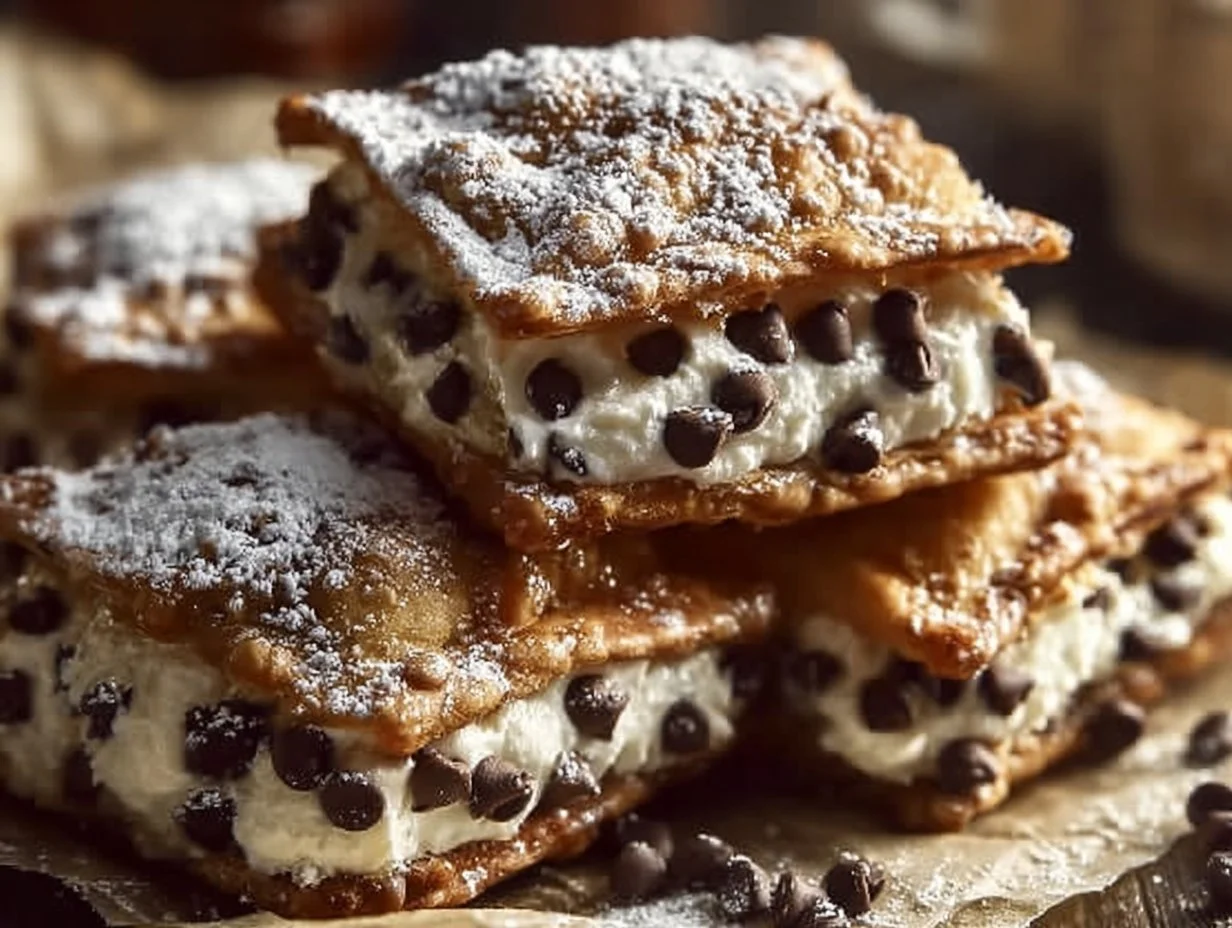
Table of Contents
What makes Classic Cannoli Squares a must-try dessert?
“Classic Cannoli Squares are a perfect blend of tradition and modern convenience.”
This is the perfect dessert to bring to any gathering, especially during the fall or winter months when everyone craves comforting sweets. They are easy to make, which means you can impress your guests without spending the entire day in the kitchen. The crunchy texture of the phyllo combined with the creamy filling creates a dreamy dessert that’s family-friendly and can easily be served in squares for easy sharing. Plus, they hold up well, making them a great make-ahead option. You can also enhance your dessert table with cannoli cookies for a delightful variety.
What sets this version of cannoli apart from others?
“Classic Cannoli Squares elevate the traditional Italian dessert with simplicity and ease of preparation.”
The beauty of this recipe lies in its simplicity. Traditional cannoli can be time-consuming and often require intricate techniques to fill the pastries perfectly. However, with these squares, I found a way to keep all the flavors while cutting down on complications. Using phyllo dough ensures a light and crispy texture, and the ability to slice these treats into squares allows for hassle-free serving. Plus, this recipe eliminates the worries of piping filling into shells, which can sometimes be tricky. Incorporate a touch of cinnamon for warmth and a balance of sweetness that will leave everyone asking for more. If you are curious about the ingredients’ richness, check out the detailed analysis on cannoli history.
What ingredients do I need for Classic Cannoli Squares?
“To make Classic Cannoli Squares, you’ll need a few simple ingredients that pack a lot of flavor.”
| Ingredient | Quantity |
|---|---|
| Phyllo dough | 1 package |
| Ricotta cheese | 2 cups |
| Powdered sugar | 1 cup |
| Vanilla extract | 1 teaspoon |
| Mini chocolate chips | 1/2 cup |
| Cinnamon | 1/2 teaspoon |
| Melted butter | for brushing |
| Pistachios | optional, for garnish |
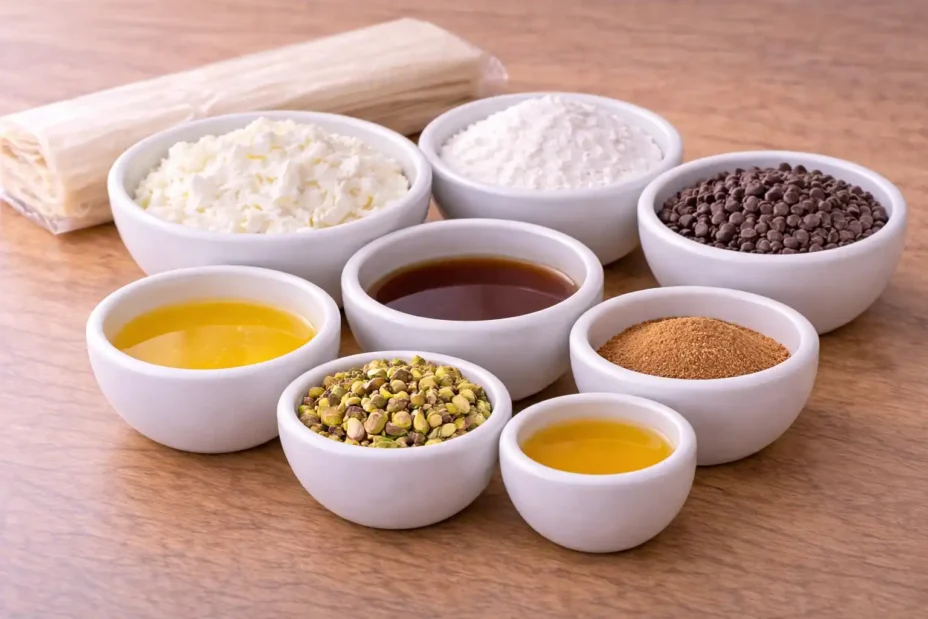
Ricotta cheese is a star ingredient in this dessert, bringing a creamy texture without being overly heavy. For a healthier twist, you can use part-skim ricotta, which still provides that luscious mouthfeel while reducing fat content. Additionally, if you’re looking to add more crunch, consider swapping in some almond slivers or mixing in a few toasted nuts with the chocolate chips.
How do I make Classic Cannoli Squares step by step?
“Making Classic Cannoli Squares is as simple as layering, mixing, and baking!”
Step 1
Start by preheating your oven to 375°F (190°C). Having a properly heated oven from the beginning is essential for achieving crispy layers on your phyllo dough.
Step 2
On a clean surface, lay out one sheet of phyllo dough and lightly brush it with melted butter. Layer another sheet on top, repeating this until you have 6 to 8 layers of dough. The more layers you have, the crunchier the crust will be!
Step 3
In a mixing bowl, combine ricotta cheese, powdered sugar, vanilla extract, cinnamon, and mini chocolate chips. Stir until well blended and creamy. This mixture should be sweet and rich, perfect for balancing against the crispness of the dough.
Step 4
Spread the ricotta mixture evenly over the layered phyllo dough, then fold the dough over the filling to form a square shape. Brush the top with melted butter to ensure an enticing golden brown crust.
Step 5
Transfer the squares to the oven, baking for about 25-30 minutes until they are golden and crispy. The aroma will fill your kitchen with an inviting warmth.
Step 6
Let the squares cool slightly before cutting into pieces. If desired, garnish with chopped pistachios for added flavor and visual appeal.
| Prep Time | Cooking Time | Total Time | Nutritional Values (per square) |
|---|---|---|---|
| 15 mins | 30 mins | 45 mins | 200 calories |
What are creative variations and serving ideas for Classic Cannoli Squares?
“Classic Cannoli Squares are versatile; they can easily be adapted to suit different tastes and occasions!”
Diet swap
For a gluten-free option, swap the phyllo dough with gluten-free pastry sheets to enjoy these squares with no compromise. It’s a perfect solution for those with gluten sensitivities.
Flavor variation
If you want to jazz things up, try adding some orange zest to the ricotta mixture for a fresh citrus note. This bright flavor will complement the sweetness beautifully. You can also experiment with adding different flavored extracts, such as almond or coconut. Enjoy these with a side of healthy banana oatmeal muffins for a balanced dessert spread.
Serving idea
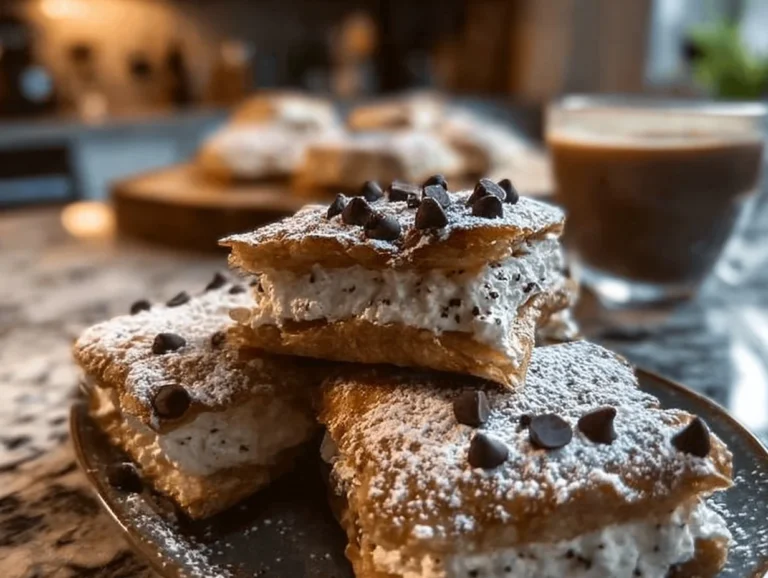
Serve these squares warm with a drizzle of chocolate or caramel sauce on top for an extra touch of indulgence. Pairing them with a scoop of vanilla ice cream can also elevate the experience to something truly special.
| Suggested Pairings | Tips |
|---|---|
| Coffee or espresso | Works well to complement the richness |
| Fresh fruit salad | Adds a refreshing contrast to the sweetness |
| Whipped cream | For an ultra-decadent treat |
What are some final tips and thoughts on Classic Cannoli Squares?
This recipe for Classic Cannoli Squares has quickly become a favorite in my home. Not only is it simple to prepare, but it impresses anyone fortunate enough to taste it. They store well in the refrigerator for several days, although I doubt they will last that long! If you feel inspired, share your baked creations on Pinterest with the hash tag #ClassicCannoliSquares and spread the joy!
Remember to take your time layering the phyllo for that perfect crunch and to let them cool slightly for easier slicing. I always love adding garnishes like pistachios for a touch of color and flavor to make them even more appealing.
FAQ
How do I store Classic Cannoli Squares?
Store your Classic Cannoli Squares in an airtight container in the refrigerator. They will keep for about three to four days. However, for the best texture, it is recommended to enjoy them fresh as the phyllo may lose its crispiness over time.
Can I freeze these squares?
While it is possible to freeze Classic Cannoli Squares, the texture may change once thawed. If you choose to freeze them, wrap tightly in plastic wrap and then store in a freezer-safe container for up to a month. Thaw in the refrigerator before serving.
What can I use instead of ricotta cheese?
If you’re looking for an alternative to ricotta, you can use mascarpone cheese for a creamier texture. Cottage cheese is another option; just blend it until smooth. Both substitutes will alter the flavor slightly but will still create a delicious filling.
Are there any nut-free alternatives?
If you want to make this recipe nut-free, simply omit the pistachios or choose seeds like sunflower seeds as a garnish instead. Always double-check ingredients to ensure they are nut-free, especially any chocolate or flavored items.
How can I enhance the flavors in the filling?
Enhancing the filling is easy! You can add spices like nutmeg or even a hint of espresso powder for a cappuccino flavor. Citrus zest (like lemon or orange) can also brighten up the filling and add a delightful kick.
Classic Cannoli Squares
Indulge in the rich flavors of Classic Cannoli Squares, a delightful twist on traditional cannoli. Made with layers of crispy phyllo dough and a creamy ricotta filling, these treats are perfect for any occasion.
- Total Time: 45 minutes
- Yield: 12 squares 1x
Ingredients
- 1 package phyllo dough
- 2 cups ricotta cheese
- 1 cup powdered sugar
- 1 teaspoon vanilla extract
- 1/2 cup mini chocolate chips
- 1/2 teaspoon cinnamon
- Melted butter, for brushing
- Optional: Pistachios, for garnish
Instructions
- Preheat your oven to 375°F (190°C).
- On a clean surface, lay out one sheet of phyllo dough and lightly brush it with melted butter. Layer another sheet on top, repeating until you have 6 to 8 layers of dough.
- In a mixing bowl, combine ricotta cheese, powdered sugar, vanilla extract, cinnamon, and mini chocolate chips. Stir until well blended and creamy.
- Spread the ricotta mixture evenly over the layered phyllo dough, then fold the dough over the filling to form a square shape. Brush the top with melted butter.
- Transfer the squares to the oven, baking for about 25-30 minutes until golden and crispy.
- Let the squares cool slightly before cutting into pieces. Garnish with chopped pistachios if desired.
Notes
For a gluten-free option, swap the phyllo dough with gluten-free pastry sheets. Consider adding orange zest to the ricotta mixture for a fresh citrus note.
- Prep Time: 15 minutes
- Cook Time: 30 minutes
- Category: Dessert
- Method: Baking
- Cuisine: Italian
- Diet: Vegetarian
Nutrition
- Serving Size: 1 square
- Calories: 200
- Sugar: 10g
- Sodium: 130mg
- Fat: 8g
- Saturated Fat: 3g
- Unsaturated Fat: 4g
- Trans Fat: 0g
- Carbohydrates: 25g
- Fiber: 1g
- Protein: 6g
- Cholesterol: 25mg
No comment yet, add your voice below!