

If you crave a treat that’s both delicious and nutritious, these Protein Rice Krispie Treats are calling your name.
You can’t go wrong with this combination of crispy cereal and creamy nut butter. Every bite is a textures explosion, and they’re simple enough to whip up any day of the week. I remember making these with my kids, and they always loved helping mix the ingredients together. Give this easy no-bake treat a try; you won’t regret it!

Table of Contents
Why Are Protein Rice Krispie Treats Perfect for Busy Lives?
“Protein Rice Krispie Treats are the ultimate quick and nutritious snack.”
In today’s fast-paced world, these treats provide a simple, on-the-go snack that offers both taste and nutrition. They are quick to prepare, require no baking, and can be made in just 30 minutes. Ideal for saving time while ensuring your family enjoys a wholesome treat.
Plus, these Rice Krispie treats are versatile and can cater to a family’s picky eaters. They’re not only perfect as an afternoon snack but also ideal for post-workout refuel or a grab-and-go breakfast. With a balance of carbohydrates and protein, they make a great addition to any healthy eating plan. Try pairing them with a cup of Greek yogurt or a banana for a complete snack! You can check out my energy cookie recipe here, which also makes a great protein boost!
What Sets This Protein Rice Krispie Treats Recipe Apart?
“This recipe stands out thanks to its unique use of protein powder and nut butter.”
Unlike traditional Rice Krispie treats that primarily rely on marshmallows and butter, this version incorporates protein powder, adding a nutritious twist. Not only does it enhance the protein content, making these treats a post-workout favorite, but it also keeps sugar levels in check.
Protein Powder Choices
If you prefer, you can use vanilla or chocolate protein powder, allowing you to customize the flavor to your liking. Each variation will result in a different nuance, whether it’s the rich cocoa of chocolate or the sweet hints of vanilla. It’s all about keeping it fun in the kitchen!
Nut Butters
Peanut butter or almond butter both work splendidly for this recipe. They bring creaminess and healthy fats to the mix, ensuring a satisfying snack experience. You can even experiment with sunflower seed butter if you have a nut allergy, making it a family-friendly option!
Quick Prep without Oven
Skipping the oven not only saves time but also keeps your kitchen cool – a great choice for summer and a win for busy parents. You simply heat the ingredients on the stove for a few minutes before mixing.
What Ingredients Will You Need for Protein Rice Krispie Treats?
“You’ll only need five simple ingredients for these tasty treats!”
The simplicity of this recipe is part of its charm. Here’s what you will need:
| Ingredient | Quantity |
|---|---|
| Rice Krispies cereal | 3 cups |
| Protein powder (vanilla or chocolate) | 1 cup |
| Peanut butter or almond butter | 1/2 cup |
| Honey or maple syrup | 1/4 cup |
| Mini chocolate chips (optional) | 1/2 cup |
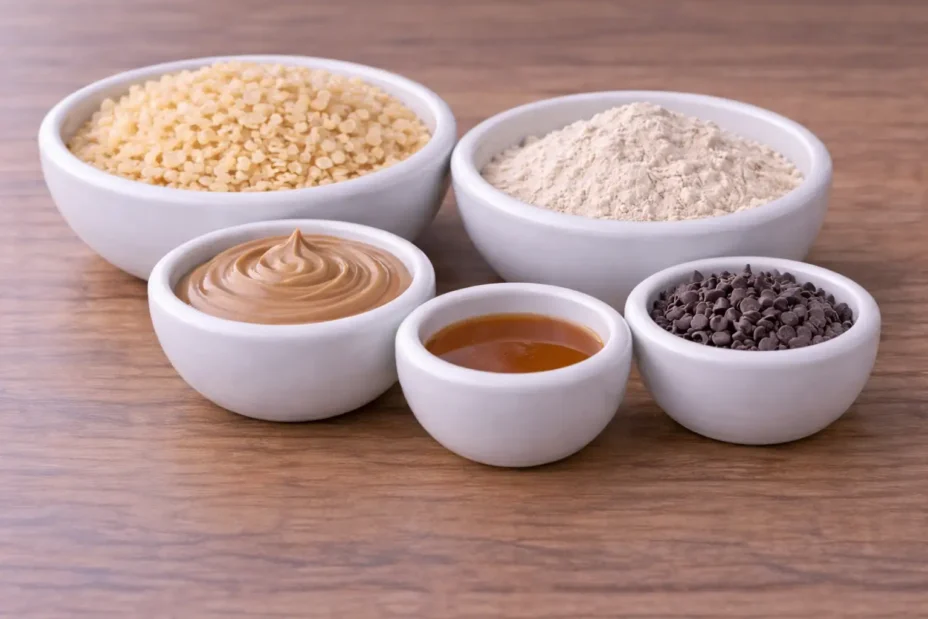
Rice Krispies contribute that delightful crispy texture, while protein powder adds an excellent nutritional punch. Peanut butter or almond butter provides creaminess and depth of flavor, and honey or maple syrup has the perfect sweetness. If you choose to fold in mini chocolate chips, they create indulgent surprises in each bite.
These ingredients don’t just come together beautifully, but they also cater to a variety of diets. Even those on gluten-free diets can enjoy them by ensuring that your cereal and protein powder are gluten-free!
What Are the Steps in Making Protein Rice Krispie Treats?
“Making these Protein Rice Krispie Treats is simple and fun!”
The preparation is quick, taking less than 15 minutes, and you only need a few kitchen tools to get started. Gather a mixing bowl, a saucepan, and an 8×8 inch baking dish.
Step 1
In a large bowl, mix together the Rice Krispies cereal and protein powder until well combined.
Step 2
In a small saucepan, combine the peanut butter and honey over low heat until melted and the mixture is mixed well.
| Prep Time | Cooking Time | Cooling Time | Total Time | Nutritional Value (per serving) |
|---|---|---|---|---|
| 5 min | 10 min | 30 min | 45 min | 150 calories |
Step 3
Pour the peanut butter mixture over the Rice Krispies and stir until fully combined.
Step 4
If you’re using chocolate chips, fold them into the mixture now for an added treat.
Step 5
Press the mixture firmly into a greased 8×8 inch baking dish. This helps them hold together when cooled.
Step 6
Allow to cool for about 30 minutes before cutting them into bars. Enjoy!
Don’t forget to keep your hands wet when pressing the mixture into the pan for a smoother finish. These little tips make all the difference!
What Are Some Variations and Serving Suggestions?
“These Protein Rice Krispie Treats are versatile enough for everyone in the family!”
So, how can you customize this recipe to suit your taste preferences? The possibilities are endless!
Diet Swap
If you’re avoiding gluten, make sure to select gluten-free Rice Krispies and protein powder. Vegan options are also readily available, with plant-based protein powders and nut or seed butters in place of traditional ingredients.
Flavor Variation
For a fruity twist, consider adding dried fruits such as cranberries, raisins, or chopped apricots. You could also swap the chocolate chips for sprinkles for a festive look! These banana oatmeal muffins also make a great, healthy snack option.
Serving Ideas
The finished bars are perfect as quick snacks, breakfast on the go, or even packed in school lunches. Pair these with a smoothie or some fresh fruit to create a balanced meal.
| Suggested Pairings | Tips |
|---|---|
| Fruit smoothies | Cut small for younger children |
| Yogurt parfaits | Store in an airtight container |
| Nut butter dip | Keep churning as you mix |
Each variation ensures that your Protein Rice Krispie Treats stay fresh and exciting!
Final Thoughts
These Protein Rice Krispie Treats are not just a tasty treat; they’re a wonderful way to nourish your body while indulging in sweetness. I love to make these bars in advance for busy weeks ahead and store them in the fridge for quick snacking or breakfast.
Knowing that my kids can enjoy a healthy option that feels like a treat is a big win in my book. As you experiment with this recipe, don’t hesitate to customize it to fit your family’s taste buds. I promise, they’ll vanish in no time, so make extra! For more nifty ideas, check out my Pinterest board for inspiration!
FAQ
How long do Protein Rice Krispie Treats last?
Protein Rice Krispie Treats typically last about one week when stored in an airtight container in the fridge. You can also freeze them for up to three months! Just make sure each bar is wrapped individually to avoid freezer burn.
Can I make these treats vegan?
Absolutely! To make these treats vegan, simply use a plant-based protein powder and substitute honey with maple syrup. Choose a vegan nut or seed butter as well, like almond or sunflower seed butter.
Is this recipe gluten-free?
Yes, this recipe can easily be made gluten-free by ensuring your Rice Krispies cereal and protein powder are certified gluten-free. Just check the labels to be sure.
How can I add more flavor to the treats?
To amp up the flavor, you can add extracts like vanilla or almond extract. Dried fruits, or flavored protein powders also work wonders for an extra taste boost!
What can I use instead of Rice Krispies cereal?
If you wish to switch things up, you can use puffed rice, cornflakes, or even gluten-free cereal blends as substitutes. Just ensure the texture holds up when mixed.
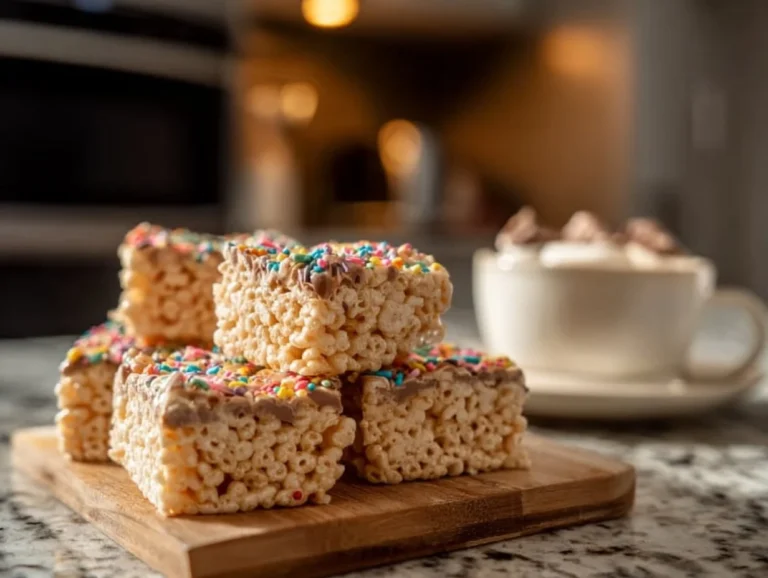
Protein Rice Krispie Treats
These no-bake Protein Rice Krispie Treats combine the crunchy texture of Rice Krispies with protein powder and nut butter for a nutritious snack that’s perfect for any time of day.
- Total Time: 30 minutes
- Yield: 12 servings 1x
Ingredients
- 3 cups Rice Krispies cereal
- 1 cup protein powder (vanilla or chocolate)
- 1/2 cup peanut butter or almond butter
- 1/4 cup honey or maple syrup
- 1/2 cup mini chocolate chips (optional)
Instructions
- In a large bowl, mix together the Rice Krispies cereal and protein powder until well combined.
- In a small saucepan, combine the peanut butter and honey over low heat until melted and mixed well.
- Pour the peanut butter mixture over the Rice Krispies and stir until fully combined.
- If using chocolate chips, fold them into the mixture now.
- Press the mixture firmly into a greased 8×8 inch baking dish.
- Allow to cool for about 30 minutes before cutting into bars.
Notes
Keep hands wet when pressing the mixture into the pan for a smoother finish. These treats can be customized with various add-ins or flavors.
- Prep Time: 5 minutes
- Cook Time: 10 minutes
- Category: Snacks
- Method: No-Bake
- Cuisine: American
- Diet: High Protein, Vegetarian
Nutrition
- Serving Size: 1 bar
- Calories: 150
- Sugar: 8g
- Sodium: 100mg
- Fat: 7g
- Saturated Fat: 1g
- Unsaturated Fat: 6g
- Trans Fat: 0g
- Carbohydrates: 20g
- Fiber: 2g
- Protein: 5g
- Cholesterol: 0mg


5 Comments
[…] overwhelming your taste buds. If you’re looking for flavorful options, explore other recipes like Protein Rice Krispie Treats for more healthy […]
[…] to the smoothie’s muscle-repairing benefits, particularly after workouts. Try pairing it with a protein-packed snack for an energizing […]
[…] In this recipe, peanut butter is a standout ingredient, not just for its delicious flavor but its protein content as well. It’s a great source of healthy fats that helps keep you full longer. One adjustment you can make is swapping out peanut butter for almond or cashew butter if you’re looking for something different. Combined with the potassium-rich bananas, you have a nutrient-packed smoothie that fuels your day. If you’re interested in other protein-packed meals, make sure to try Protein Rice Krispie Treats! […]
[…] Switching base ingredients helps tailor this latte to various dietary preferences. […]
[…] looking to enhance not only the flavor but also the nutritional profile, consider incorporating protein-rich snacks into your meal […]