

Sometimes, after running errands or enjoying a busy morning, I find myself craving something delicious that feels indulgent yet comforting. Today, I want to share with you my take on the adored Easy Gluten-Free Cheese Danish, inspired by those delightful pastries from Starbucks. This recipe provides that sweet, creamy, and flaky goodness without the gluten, making it a fantastic option for brunch, breakfast, or even a cozy afternoon snack! Just imagine the warmth of freshly baked pastries filling your kitchen, crafting the perfect atmosphere for relaxation or gathering with loved ones.
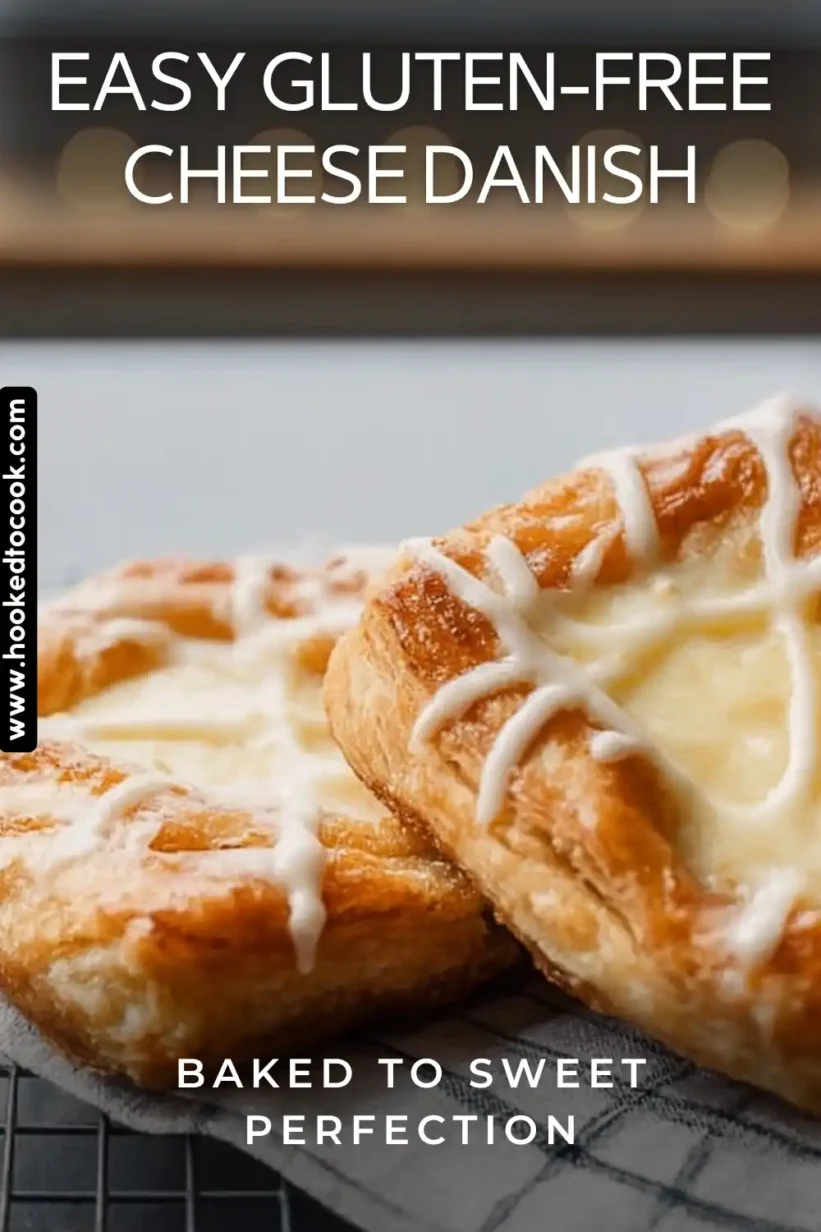
Table of Contents
The Story Behind My Gluten-Free Cheese Danish
Years ago, I discovered my love for cheese danishes while stopping at Starbucks for a cup of coffee on my way to work. I would indulge in a warm, flaky pastry that paired so nicely with my morning brew. However, my journey to gluten-free living challenged me to find alternatives to my favorite treats. I started experimenting with gluten-free puff pastry and various fillings until I developed my own Easy Gluten-Free Cheese Danish recipe that mimicked those delightful Starbucks treats. Every time I bake these, the nostalgia floods back, and it feels like a little piece of my past being recreated right in my kitchen.
This recipe brings back those memories while staying true to dietary needs. Whether you’re gluten-sensitive or just looking for an alternative recipe to add to your repertoire, I believe you’ll find joy in this creation. Enjoying these danishes will bring a sense of warmth and happiness to your mornings just like it does for me. Want more delightful pastries? You might also want to check out these delicious pumpkin scones for added variety!
Print
Easy Gluten-Free Cheese Danish (Starbucks Copycat)
Delightful breakfast treat inspired by Starbucks, this Easy Gluten-Free Cheese Danish offers a sweet, creamy, and flaky goodness without gluten.
- Total Time: 29 minutes
- Yield: 6 servings 1x
Ingredients
- 4 ounces Cream Cheese (softened)
- 2 tablespoons Granulated Sugar
- 1 teaspoon Lemon Juice
- 1 teaspoon Vanilla Extract
- 1 sheet Gluten-Free Puff Pastry (defrosted)
- 1 Large Egg (beaten for egg wash)
- 1 cup Powdered Sugar (for glaze)
- 1 tablespoon Milk (for glaze)
Instructions
- Preheat oven to 400°F.
- In a small bowl, combine cream cheese, granulated sugar, lemon juice, vanilla extract, and a pinch of salt.
- Unroll gluten-free puff pastry on a clean surface, cut into 6 equal rectangles.
- Prick the centers of each pastry with a fork.
- Spread the cream cheese filling in the center of each pastry.
- Brush the edges with the egg wash.
- Bake for 12-14 minutes or until golden brown.
- Cool slightly and mix powdered sugar with milk for glaze.
- Pipe glaze over danishes and serve.
Notes
Feel free to add lemon zest or fresh fruit on top before serving for extra flavor.
- Prep Time: 15 minutes
- Cook Time: 14 minutes
- Category: Breakfast
- Method: Baking
- Cuisine: American
- Diet: Gluten Free
Nutrition
- Serving Size: 1 Danish
- Calories: 280
- Sugar: 12g
- Sodium: 200mg
- Fat: 15g
- Saturated Fat: 8g
- Unsaturated Fat: 5g
- Trans Fat: 0g
- Carbohydrates: 30g
- Fiber: 1g
- Protein: 5g
- Cholesterol: 40mg
Why This Easy Gluten-Free Cheese Danish Works
This recipe is a brilliant combination of textures and flavors that come together to create the perfect danish. The gluten-free puff pastry offers the flaky, buttery texture we love without the gluten, making it accessible to everyone. The cream cheese filling adds richness and a hint of sweetness, while the lemon juice and vanilla extract create a beautifully balanced flavor profile.
Simple Ingredients
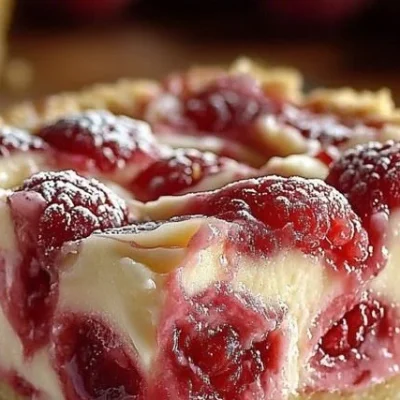
The beauty of this Easy Gluten-Free Cheese Danish lies in its simple yet delightful ingredients. With just a few pantry staples such as cream cheese, granulated sugar, lemon juice, and vanilla extract, you can whip up a batch in no time. Not only do these ingredients pair remarkably well, but they also provide that authentic danish flavor we’re all dreaming of. Did you know that cream cheese can make a lovely filling for various pastries? You can explore more recipes using cream cheese like this strawberry swirl cheesecake.
Perfect for Any Occasion
Another reason this recipe works beautifully is its versatility. Whether you pair it with a steaming cup of coffee for breakfast, serve it at a brunch gathering, or just enjoy it as a cozy treat while you unwind, these danishes fit the bill. Plus, they can be made ahead of time, just bake them fresh when you’re ready!
Healthier Choice
By using gluten-free puff pastry and making your own filling, you can control the ingredients and make healthier choices. For those who are gluten-sensitive, going home with a couple of gluten-free pastries instead of their traditional counterparts can be a rewarding experience. For more insight into the benefits of a gluten-free diet, check out this article from Mayo Clinic.
Step-by-Step Instructions for Creating Your Cheese Danish
If you’re ready to delight your taste buds with these Easy Gluten-Free Cheese Danishes, let’s get started! Baking these pastries is simple and rewarding, and I guarantee they’ll become a household favorite. Seriously, once you get the hang of it, you’ll wonder why you didn’t try to make them sooner!
Preparation and Baking Steps
First, preheat your oven to 400°F. This is essential to get that perfect, golden crust on your pastries. While the oven is heating, grab a small bowl and combine the softened cream cheese, granulated sugar, lemon juice, vanilla extract, and a pinch of salt.
| Ingredient | Quantity |
|---|---|
| Cream Cheese (softened) | 4 ounces |
| Granulated Sugar | 2 Tablespoon |
| Lemon Juice | 1 teaspoon |
| Vanilla Extract | 1 teaspoon |
| Gluten-Free Puff Pastry | 1 sheet (defrosted) |
| Large Egg | 1 (beaten for egg wash) |
| Powdered Sugar | 1 cup (for glaze) |
| Milk | 1 Tablespoon (for glaze) |
Next, take your gluten-free puff pastry sheet and unroll it onto your clean kitchen surface. It may require some gentle patching or re-rolling if there are any breaks, but that’s all part of the fun! Once you have it ready, cut the pastry into 6 equal rectangles and space them about 2 inches apart on a parchment-lined baking sheet.
Using a fork, prick the centers of each pastry. This helps them maintain their shape during the baking process. Now, spread a delightful dollop of the cream cheese filling in the center of each one, ensuring you leave some space around the edges.
With a small bowl, beat your egg and, using a brush or your fingers, apply the egg wash to the exposed edges of the pastries for a golden finish. Bake in your preheated oven for about 12-14 minutes or until they’re beautifully golden brown. Once done, allow the danishes to cool slightly before adding the finishing touch: the glaze.
Simply mix the powdered sugar and milk together until smooth. Then, scoop the icing into a small zip-top bag, snip off a corner, and pipe delicious lines of frosting across each danish. These tasty treats are now ready to be devoured!
Don’t forget to experiment during the cooling process! You can add a sprinkle of lemon zest to the filling or perhaps some fresh fruit on top before serving, I promise, they will look beautiful!
Creative Variations & Serving Ideas
Part of the fun with these Easy Gluten-Free Cheese Danishes is how you can customize them! If you’re feeling adventurous, why not try adding fruits or different cheesecakes flavors into your fillings?
Fruit-Filled Variations
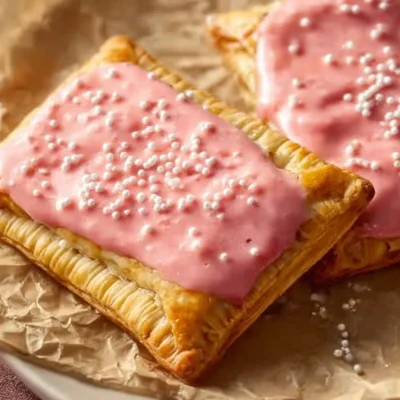
Consider adding a spoonful of raspberry or blueberry jam into your cream cheese mixture for a fruity twist. These flavors pair so wonderfully with the tangy cheese, creating a burst of flavor in each bite. You could also try using fresh berries right inside the danish along with the cream cheese filling, as this not only enhances the flavor but also adds a pop of color!
| Variation | Additional Ingredient |
|---|---|
| Berry Cream Cheese Danish | 1/2 cup fresh mixed berries |
| Lemon Blueberry Danish | 1/4 cup blueberry jam + Zest from 1 lemon |
| Chocolate Chip Danish | 1/3 cup chocolate chips |
Serving Ideas to Elevate Your Experience
When it comes to serving, pair these danishes with coffee or a fresh brew of tea for a perfect breakfast or snack combo. If you’re hosting a brunch, consider placing them on a pretty platter alongside a creamer of flavored coffee or tea. Presentation can elevate the experience significantly, and watching the delight on your friends’ faces when they see these beautiful pastries will be priceless!
Add a Touch of Whipped Cream
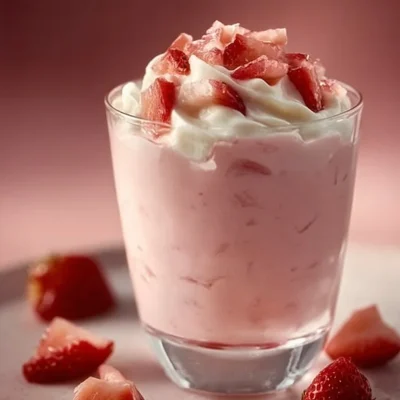
Feeling extra indulgent? Top each danish with a dollop of whipped cream as you’re serving. It takes the treat to another level, adding a creamy, dreamy layer that will melt in your mouth. Perfect for those special occasions or simply to make an ordinary day feel extraordinary! Pair your pastry with a warm cinnamon orange delight mocktail for an extra festive touch.
Final Thoughts on Your New Favorite Danish
I hope you’re inspired to give this Easy Gluten-Free Cheese Danish recipe a try! It’s not just about the delicious flavors; it’s also about crafting memories with family and friends around food that everyone can enjoy. Each creamy, heavenly bite brings back memories of cozy mornings, those warm Starbucks pastries, and the joy of sharing with loved ones.
Plus, with its homemade touch, you can feel proud of what you serve. From festive brunches to special gatherings, keeping this recipe handy will surely beckon compliments from everyone at the table! Remember, the beauty of cooking lies in creativity and connection. You can always customize recipes to fit your taste or dietary needs.
Before you embark on your baking adventure, don’t forget to check out other delightful snacks like the brown sugar ermine frosting or explore fun ideas on my Pinterest for endless inspiration!
FAQ
Can I make these danishes ahead of time?
Yes, you can assemble the danishes ahead of time and keep them in the refrigerator until ready to bake. This is a great time-saver when hosting guests! Just add a few extra minutes to the baking time.
What’s the best way to store leftovers?
Store leftover danishes in an airtight container at room temperature for up to 2 days or in the refrigerator for up to a week. You can reheat them in the oven for 5-10 minutes to restore their flakiness.
Can I make these danishes dairy-free?
Absolutely! You can substitute the cream cheese with dairy-free alternatives such as almond cream cheese or cashew cheese. Just ensure that the other ingredients you use are also dairy-free.
Can I freeze these cheese danishes?
Yes, once baked and cooled, you can freeze the danishes. Wrap each pastry in plastic wrap and then place them in a freezer-safe bag. When ready to eat, thaw and reheat in the oven.
What can I use instead of gluten-free puff pastry?
If you don’t have gluten-free puff pastry, you can use gluten-free phyllo dough, or opt for a homemade gluten-free dough using almond flour or a gluten-free all-purpose flour mix.
2 Comments
[…] Each time I bake this gluten-free cake, I think about my beloved grandmother. She had a knack for whipping up delicious desserts with whatever she had on hand. Inspired by her resourceful spirit, I developed this easy cake recipe that can be adapted with various flavors and toppings. Whether you celebrate a birthday, gathering, or simply a Sunday feast, I promise this cake will brighten your day. You can learn more about gluten-free baking techniques by checking out my Easy Gluten Free Cheese Danish. […]
[…] Rolled oats are a gluten-free grain that serves as the base for these muffins, making them suitable for those with gluten sensitivities or celiac disease. Oats are also rich in important nutrients like iron and B vitamins, and they keep you feeling full longer, which can be beneficial if you’re watching your weight. You can find more gluten-free recipes in our Easy Gluten-Free Cheese Danish. […]